July 26, 2013
White Zucchini Cake Slice


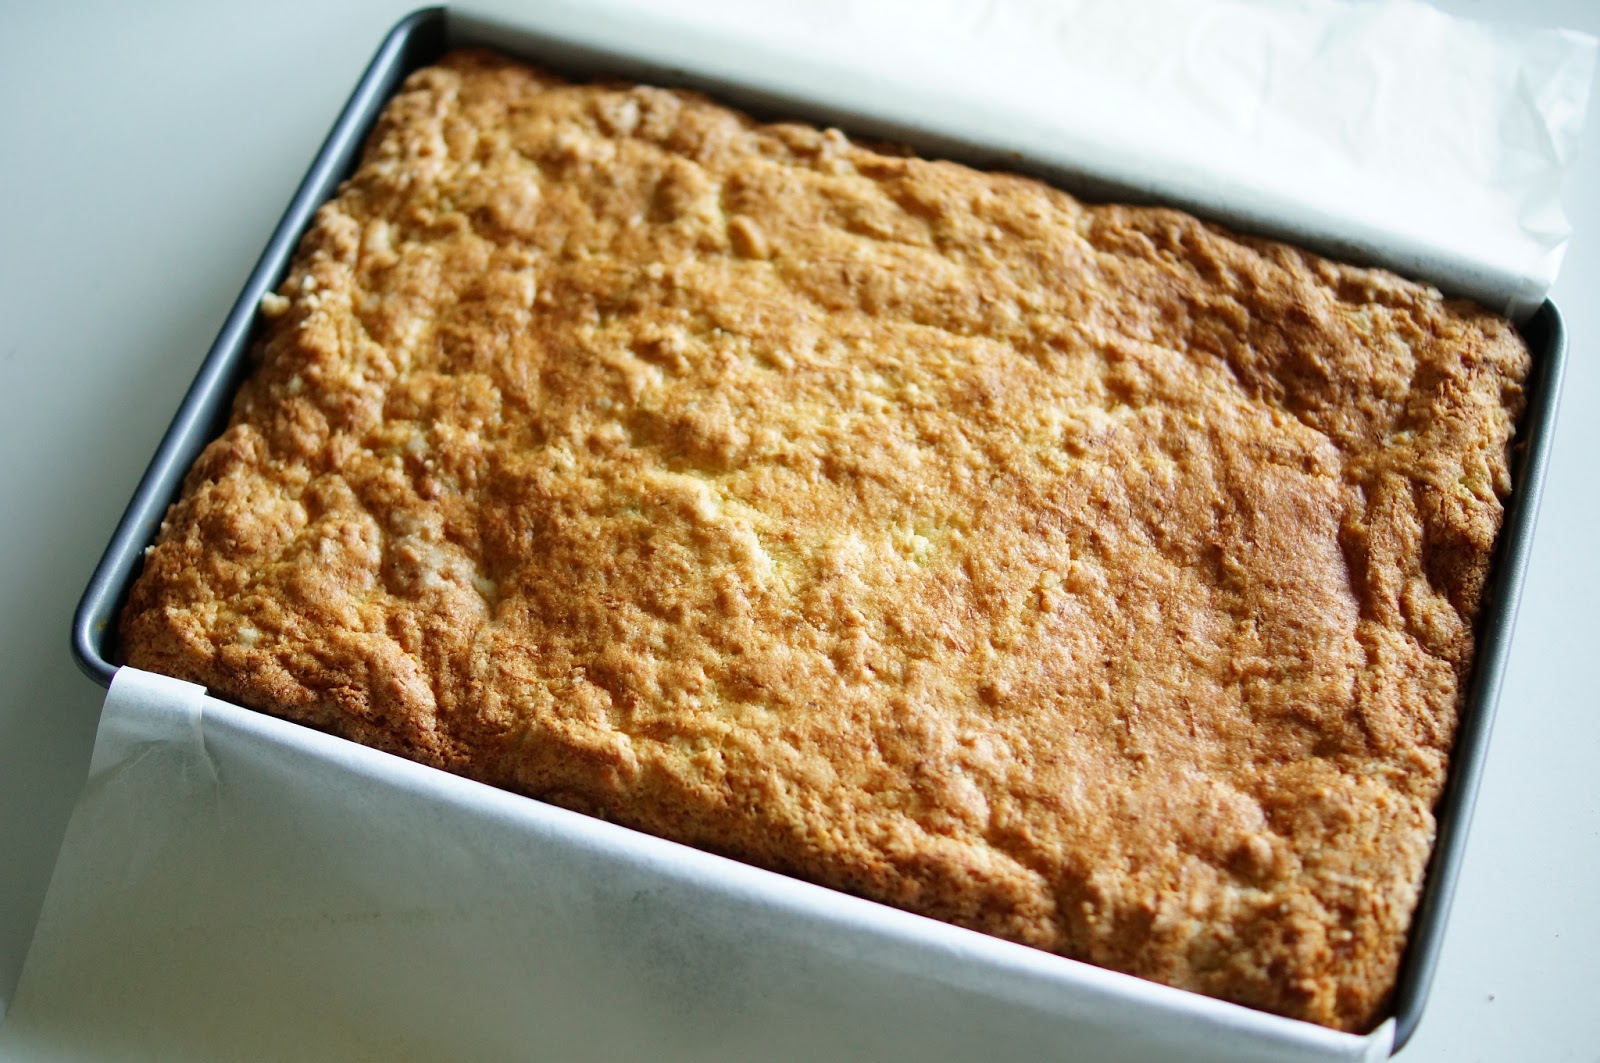


White Zucchini Cake Slice Recipe
Ingredients:
- 2.5 cups of plain flour
- 1.5 tsp baking soda
- 1.5 cup white caster sugar
- 0.5 cup rice bran oil or vegetable oil
- Big tsp of good vanilla extract
- 80gm melted white chocolate
- 2 cup shaved lebanese zucchini (normal zucchini will also do but lebanese variety is sweeter)
Steps:
- Preheat oven to 180degrees celcius
- Place the sugar, oil and vanilla and mix until well combined (use a standing mixer or by hand with a wooden spoon)
- Sift the dry ingredients, flour, baking soda and salt and slowly add to the liquid sugar oil mixture (it will get clumpy and biscuit crumb like texture)
- Pour in your melted white chocolate and combine.
- Fold in your shaved zucchini and you will start to see the batter become more moist but still a thick mixture.
- Place and spread out the mixture in your prepared baking tin and place in the oven for 25 minutes (it should be just cooked...try not to overlook this, you still want it more on the slight undercooked side if you are unsure!). Leave in tin but place on wire rack to cool
Milk Chocolate & White Chocolate Icing recipe
Ingredients:
- 2 cups icing sugar (soft mixture)
- 3 TBSP good cocoa powder (I used Valrhona)
- 3-4TBSP boiled water
- Good dollop of vanilla extract
- 100gm melted white chocolate
Steps:
1. Sift icing sugar and
cocoa together into a large bowl, then whisk in the boiled water until you get
a glossy silky texture (if its too thick, slowly add small drops of more boiled
water, if too thin, add more sifted icing sugar, a little at a time,you just
want a really spreadable glossy liquid that will later set).
2. Stir in the vanilla
then, working quickly, spread the icing onto your cooked and cooled cake slice
(whilst its still in the tin)
3. Using a tablespoon,
pick up some melted white chocolate and drop horizontal lines across the width
of the cake slice. In a zig zag motion down the length of the cake is fine too!
4. Using a skewer, draw
and drag your skewer, skimming the white and dark mixture in vertical strokes,
creating a marble effect!
5. Leave to set in the
fridge until ready to slice and eat!

Keep this slice in the fridge, and when you want to eat a slice, take it out of the fridge and let it come to room temperature so the icing is goopy and the sponge eases up.
X
July 25, 2013
10 Tried & True


On the other hand, I quite enjoy going through the motions of searching for the "holy grail" of beauty products like the perfect foundation, the perfect mascara, or the perfect scent, so its quite rare that I have the same items sitting in my makeup case / makeup bag / bathroom cupboards which I reach for, and refill time and time again.
In this spirit, I thought to have a once in awhile series of my top ten "tried and true" beauty products. Beauty products that I'm loving for the moment and are suited to my situation. While I know that things like skincare items, haircare and scent products are a very personally tailored choice, I'll try my best to detail why I have reached for the below items time and time again*

One. Rimmel Exaggerate Liner in Noir. On a whim, about a year ago, I decided I wanted to try more drugstore brands to save on the pocket, and picked up this little waterproof number from my local PriceLine. I will say that my eyes are very prone to having eyeliner or mascara 'drop down' past my lower lash line through out the day, hence the need for me to choose a waterproof liner (trust me, it helps!). This has become my daily go to, defineable, smudgeable and reliable liner. The one above is probably my 8th or 9th refill purchase.
Two. Soleil Tan de Chanel. This bronzer is pitched as a universal bronzer, suiting every skin and, at first when I bought this blind (based on online reviews from my fave YouTube beauty gurus), I was shocked at the slight orangey tinge of the brown and had immediate regret. However I was pleasantly surprised that this is more of a buildable product, and its important to use light layers. It is a cream bronzer, but after application almost sets with a powder finish. I alternate with applying it on top of powdered or foundationed or naked skin to give myself a bit of a warm glow and feel happy with either application. I've also used it as a natural eyeshadow. Like most high-end makeup products, this has a slight scent which I actually like, and can only describe it as a "clean" slight rosey scent (if that even makes sense). While the price point is high, I haven't needed to buy another pot, it's brilliant. See one of my favourite Youtube beauty gurus use it in various ways here!
Three. Revlon Just Bitten Kissable balm stain. Unlike most drying lip stains, this benefits 2-fold by giving your lips quite a good tint of colour, coupled with moisturisation of a lip balm. Has a wide range of colours... I own 4. The one in the pic above is in the shade 020 Lovesick. I've worn this one in this post here, and absolutely adore it. Easy to apply, and while the balminess wears off during eating and drinking, the coloured tint remains a lot longer!
Four. Garnier BB Cream Miracle Skin Perfector for Oily/Combo skin in shade Medium. BB creams aren't designed to be full coverage, but more of a skin tone corrector and I would have to say this one doesn't disappoint. It manages to even out my skin tone, seemingly fading undereye circles, slight redness around my nose and slightly fading small brown spots (leftover from acne). I compare this to the higher end BB cream NARS Pure Radiant Tinted Moisturiser in 'St Moritz'. While I had my reservations about buying a face makeup product from a supermarket (yes, I decided to pick this up after perusing the supermarket hygiene aisle!), I have to say it performs MILES better than I would ever expect of such a low priced product. And whilst I did love my NARS tinted moisturiser in comparison, this one totally wins on price point, and the ability to not leave my face in an absolute oil slick. There is still the need to blot my forehead and nose at some points in the day, the office aircon environment is quite drying for my face and the natural reaction is to produce more oil (I doubt any skin makeup could 100% help in combating aircon woes). It is top of my list in terms of value for money. I will also mention that my face is prone to becoming quite an oil slick by the end of a work day, and I have had BAD acne issues in the past, and have found no pore clogging issues from this cream after using it for 3 months of use (the tube is still going might I add!).
Five. Real Techniques Stippling brush. After being quite a big MAC brush product pusher, I am floored that I didn't try this brand sooner. I was a bit fed up with some of my brushes shedding hairs when I decided to go on a whim and explore drugstore priced brushes. Developed by one of my favourite YouTube beauty gurus and long time makeup artist; Samantha Chapman from Pixiwoo, this is a dream for buffing on foundation, cream bronzers and blushes, powder blushes and even concealer under the eye.

Six. Neutrogena Natural Purifying facial cleanser (c/o). The best facial cleanser for my once-acne-ridden-skin / prone-to-pore-clogged skin was the Dermalogica Special Cleansing Gel. And one day when that ran out, this Neutrogena gem (kindly given to me from the folks at Johnson & Johnson), was waiting to fill in those shoes. I love anything organic, so something near to that level in a beauty product, showing a good level of natural ingredient transparency, did catch my eye. Whilst I would have to say it doesn't cleanse to the same level as my Dermalogica favourite, I've decided that it's a nicely priced substitute and am already using my newly bought second bottle.
Seven. Garnier Body Tonic Sugar Scrub. I bought this the first time to help exfoliate my dry skin on my legs. The second and third time I have bought this is not just for the functionality (it's a great sugar scrub!), but for the refreshing lemony scent. Using this at anytime of the day in the shower is totally uplifting and soul soothing. LOVE IT. I'm not so sure of the 'anti-cellulite' side of this product, as I haven't used it consistently enough to notice a difference.
Eight. Redken Diamond Oil Conditioner. This came at the recommendation of my hairdresser, light yet very moisturising for my long hair (which has currently grown past my bra line!). I'm a girl that needs to wash my hair every day otherwise I get a very oily scalp, and have hair of a coarse nature. Moisturising the strands enough without making my hair feel heavy or eliminating volume.
Nine. KMS Hair Play spray wax (c/o). I use this mainly to make my fringe or side part stay in place if its not behaving. It's great for those times where your hair isn't behaving and you need some help in remoulding/shaping, without needing to stick your fingers in a tub of wax or clay. Works like a hairspray but functions like a light wax. Perfect to smooth down flyaways, reshape parts, and hold up the most stubborn hairstyles.

Ten. Glasshouse candle in 'Avallon - Cassis & Vanilla'. I've really been into my candles for the last year, mainly for feeling of calm at the end of a work day, and the lovely glow of light I like to see in the background whilst I type away on this blog. I find burning candles is a great way to get rid of any weird leftover food smells you may have still in the air of the house, like from pan-frying a good steak or using oils to a high degree in the kitchen. I've tried many Glasshouse candles, and whilst 'Oahu - Milk & Honey' has been my fave so far (a clean, fresh laundry-like, talc like fragrance), this "Cassis & Vanilla" one has been the favourite of the month. Fresh berry scent mixed with a glimmer of warmth from the Vanilla, it somehow gives me an summer berry pie feeling! As candles aren't the cheapest homely thing you can buy (these ones are $AUD40 a pop), its really important to me that they don't lose their scent more and more after every burn. I have to say Glasshouse doesn't disappoint, and the fragrance is like new every time I light it up!
X
X
* I do have to say though, I can't guarantee that all of the make-up and/or skincare and hair care products that I state here are 100% suited to you. I will only post up tried and true products that I personally think are good after having used them on myself, my friends or clients. Everyone's skin is different and preferences even more so, and its possible to be allergic. So always try a tester if you believe the product contains ingredients you are unsure of! 'C/o' denotes a gifted product, but all opinions are of my own and not of the company that provided this product!
July 24, 2013
Let's hear it for the boys!
.jpg)
.jpg)
{Our bridal party / Photographed by the wonderful duo; Coralee & Alex}
When the girls research get carried away with all the pretty wedding inspiration on the interwebs, we quite often spend a large proportion of time on the pretty stuff for the girls... and hope that the boys will take care of their own style. And with a bit of influence from us girls, we hope the boys' style will fit into our dreams for the big day. But HEY the boys have a voice too!
Jase found his own tux and accessories, and helped the boys with their classic suits, but found it difficult finding cool places to purchase unique pieces that matched the style he was thinking in his head.
I haven't seen that many mood boards totally dedicated to grooms and groomsmen out there without all the 'fluff', so this series of posts is dedicated to the un-bridally boys, for a bit of quirky and funky bow-tie inspiration. A bow-tie for any kind of theme or taste. Let's hear it for the boys! :)

Bright & Woolly via Style Me Pretty / Subtle Polka Dot via Style Me Pretty (check out this beautiful wedding for vintage inspiration too!)/ Art Deco Stripe via Style Me Pretty / English Plaid via Rock My Wedding / Nautical Shapes via ASOS / Blush Plaid Stripe Mix via Dellbarmorad / Fun Confetti via ASOS / Textured & Slim (this is the hubster!) photographed by Coralee & Alex / Vintage stripe via ASOS / Classic Satin via Love My Way
X
July 23, 2013
Faux Bob Faux Leather


The weather over the weekend was like a peek of spring, and I think it's time for a change!


Zara Faux Leather Peplum top (similar here and here) / H&M Pants (also seen here) / Tru Trussardi Sunglasses (also seen here, and here) / ASOS strappy heels (on sale!) / Faux snakeskin clutch (purchase on holiday in Thailand)


X


Japan is known for being a country encompassing high tech and high quality things, populated with polite and humble people, beautiful scenery, great and colourful pop-culture, but also known for food and people that are crazy, cute and kitschy. I can't wait to see the restaurants, cafes and supermarkets...the culture ... the shopping... and also spending time with one of our friends whilst we are there. The extent of my Japanese speaking skills has gone down the gurgular with not having had any practice for so many years, but I'm hoping that I will be able to say more words than "domo arigato" (thank you very much), "konnichiwa" (hello!), and "torei ni doko ni arimasu-ka" (where is the toilet? - in probably the most formal way!), once we immerse ourselves in the city that has very little English speakers.
Tokyo is currently hovering around the mid-30 degrees celcius zone in temp so I'm very looking forward to even hotter temperatures, and time to strip off the winter layers! I can't wait to share a photo diary of our quick trip, in the mean time though, you can follow my quick snaps on Instagram, and I will try my best with keeping up with my normal blogging schedule of posting a few times this week :)
X
Photo credit: Top Image via yours truly! / Shinjuku alleyway via Pinterest / Shinjuku pedestrian crossing via Cam Knows / Tokyo nightlife via Tumblr / Kimono via Pinterest / Ayumi via Arc Records / Harajuku girls via Tokyo Fashion / Sailormoon! (come on... every young girl in my generation loved these girls!) / Ramen via Seattle Chow Down / Sashimi via The Food Connoisseur
July 22, 2013
Healthy Kale Chips


I know Kale Chips have been well documented around the interwebs, but I've never tried making them for myself. I came across a shelf of Kale Chips at our local supermarket which I thought, although organic, were way too expensive for a potential 10 minute chomping snack.
I'm a massive lover of potato chips, but also know that these days, with a slowed down metabolism, scoffing down potato chips every time I crave a savoury snack, isn't the best for the gut, nor the figure. Kale is rich in beta carotene, Vitamin K, Vitamin C and Calcium, eaten raw, in a smoothie or crispy like I have (though nutritional value may have been slightly lost), it's all good for ya! If you are a fan of Japanese seaweed snacks, you will definitely love giving this a go. I'm still so surprised that the Kale leaves came out crunchy, crispy and light. I was expecting something really chewy in texture.
This recipe is easy as 1-2-3!
Basic Kale Chips recipe
- Bunch of Kale (preferably organic!)
- Olive oil
- Sesame oil
- Black Lava salt or Flakey sea salt
- Oven preheated to 180 degrees celcius
- Wash your bunch of kale and chop off the stems so that you are left with just the curly leaves. Slice up the leaves in bite sized portions (about one or 2 inch in length). Spread the kale leaves on a baking tray prepared with a baking sheet / baking paper.
- Drizzle over with the olive oil, sesame oil and then finish with a sprinkling of your preferred salt
- Place in the oven for 10-15 minutes. Once you start hearing sizzling going on, you know the Kale is near ready. I pulled mine out as soon as I saw the tips of the leaves start going golden brown.


Enjoy guys and hope you start the week off right :)!
X
July 17, 2013
Food & Fashion - Honeycomb
It got to 23degrees in Sydney today... what is going on? spring is here? Mother Nature needs to stop teasing me because I'm about to put away the boots and the stockings! In tribute to this seemingly fake spring weather, today's Food & Fashion post is dedicated to Honeycomb :)


That Salted Honey icecream above looks so heartwarmingly more-ish, I really have to try it! And if I can find a good stamp, I really want to try Billy's honeycomb cookies, they look crispy and delicious.
oh and plus, those Karen Walker sunglasses will find a home here with me I'll make sure of it!
Happy hump day peeps :)
X

CLOCKWISE FROM TOP LEFT: Honeycomb Mirror via Anthropologie / Alexander Wang Honeycomb dress via Matches Fashion / Honeycomb citrus shift dress via Reiss (on sale!) / Honeycomb book shelves and mirrors via Obaz / Gorjana Honeycomb shaped hoop earrings (honeycomb patterned bracelets and necklaces also available!) / Warehouse Honeycomb Swing vest via ASOS / Teal Honeycomb mousepad via Word On / Rachel Zoe Honeycomb T Strap heels / Honeycomb Collar pins via ASOS / Dune Gold Honeycomb patterned heels via ASOS/ Honeycomb decor stencil via cutestencils / Karen Walker sunglasses (on my wishlist!)

CLOCKWISE FROM TOP LET: Honeycomb via Paper And Pigtails (check out the honey themed housewarming party styling!) / Honeycomb cookies by A Table For Two / Honey Vodka Cocktails in cute honeycomb shaped glasses via Drink of the Week / Hokey Pokey by Nigella / Salted Honey and Toast icecream by Take a Mega Bite / Honey Semifreddo by Nigella / Honey Dinner rolls by Delish
That Salted Honey icecream above looks so heartwarmingly more-ish, I really have to try it! And if I can find a good stamp, I really want to try Billy's honeycomb cookies, they look crispy and delicious.
oh and plus, those Karen Walker sunglasses will find a home here with me I'll make sure of it!
Happy hump day peeps :)
X
July 15, 2013
Khaki & Leather


Whenever I shop, I think it's always useful to remember what you already have, and then visualize matching or pairing what you're thinking of buying, with the great items you have already sitting in your wardrobe.

Leather Zara JACKET (old, but similar here and here) / Long Khaki Max STRIPE TOP (ooooold, but similar feel here in black and white) / Khaki Leopard Saben CLUTCH (limited ed, seen here) / Faux Leather French Connection PANTS (also seen here, similar here or real leather here) / Leather Cellini BOOTS (discont. but similar version here on sale too!) / Tru Trussardi SUNGLASSES (also seen here)


These last photos are so random right? As Jase and I were walking along, we came across a basket full of limes, no one around, with payment to be made in an honesty box. Didn't even know people still do this these days! Love it!
Hope you all had a good start to the week! I think summer is peering around the corner, it got to 20degrees today! CRAZY!
X
July 12, 2013
Elderflower Bramble
I'm not impartial to a good cocktail whether its in the colder or warmer months. These last couple of weekends has seen some seemingly summery weather here in Sydney and so this refreshing cocktail really filled the spirits over the weekend!

Elderflower is the quintessential edible summery bloom and I'm totally jealous of you peeps living in the Northern summer, able to make yourselves fresh elderflower cordial! Not only are they a pretty flower, but they certainly produce a beautiful fragrance, with a flavour quite akin to lychees
See Jamie Oliver's recipe to make Elderflower cordial here!
But whilst I'm unable to find actual elderflowers to make my own cordial syrup (are they even grown in Australia??), buying elderflower cordial from the local store for this easy peasy cocktail recipe will just have to do.


Fill a short glass with crushed ice and build the ingredients in order listed. Finish with more crushed ice on top!
Garnish:
Decorate however you like... maybe a long peel of lemon? A nice little lemon slice in amongst the ice?
I wanted to use edible flowers, and the only ones I found were Rosemary ones and other small wispy ones I just found at the local supermarket! They didn't overtake the cocktail at all, and you won't end up eating them if you use a straw to sip :)
-Serves 1 lucky person
St Germain liqueur can also be used in lieu of the Elderflower cordial, but you'll just have to adjust the level of Gin you put in.... or not. Whatever. Glug it all in then :)


Have a great weekend everyone!
X

Elderflower is the quintessential edible summery bloom and I'm totally jealous of you peeps living in the Northern summer, able to make yourselves fresh elderflower cordial! Not only are they a pretty flower, but they certainly produce a beautiful fragrance, with a flavour quite akin to lychees
See Jamie Oliver's recipe to make Elderflower cordial here!
But whilst I'm unable to find actual elderflowers to make my own cordial syrup (are they even grown in Australia??), buying elderflower cordial from the local store for this easy peasy cocktail recipe will just have to do.


Elderflower Bramble
(recipe passed on from a good friend)- 60ml Hayman's London Dry Gin
- 30ml Freshly squeezed Lemon Juice
- 20ml Elderflower Cordial
- 10ml Sugar Syrup
- 1 Dash of Orange Bitters
Fill a short glass with crushed ice and build the ingredients in order listed. Finish with more crushed ice on top!
Garnish:
Decorate however you like... maybe a long peel of lemon? A nice little lemon slice in amongst the ice?
I wanted to use edible flowers, and the only ones I found were Rosemary ones and other small wispy ones I just found at the local supermarket! They didn't overtake the cocktail at all, and you won't end up eating them if you use a straw to sip :)
-Serves 1 lucky person
St Germain liqueur can also be used in lieu of the Elderflower cordial, but you'll just have to adjust the level of Gin you put in.... or not. Whatever. Glug it all in then :)

Have a great weekend everyone!
X
Subscribe to:
Posts (Atom)


