June 30, 2013
Floral and Lace-up


Sunglasses (Tru Trussardi) / Top (H&M...veerrrry old) / Bag (Zara, seen here and here) / Floral Pants (Target, similar here in a more pastel colour, also on sale!) / Lace-up heels (Wittner, ON SALE HERE!)
It's not often I come across shoes that tick all the boxes, i.e. (1) look high-end, (2) sit at a comfortable height (for me anyways) and (3), are on sale. These Lace-up heels were a bargain at $37 from the Wittner store. I couldn't believe my eyes! So I did the normal girl thing and bought them just because they were on sale.... not because I was looking for them specifically (teehehe).

I don't normally go rummaging around in Target to shop for clothes either (I don't have the patience when the whole store looks unorganised)... but I chanced upon finding these floral pants last summer, on my way to the check-out counter when I was purchasing something else. They were $15. I'm telling ya... when bargains find YOU like that, you have to snap them up!


Have a good week peeps...another day, another dollar ey?
X
p.s. whoops, I didn't mean to flash a bit of bra-strap action in this last pic, but it was the only shot we got that was of my full outfit and I only realised it happened, post-production!!
June 29, 2013
Madeleines
I am keen to be on the fast track when it comes to trying every kind of French pastry under the sun, but I seem to be taking it slow in terms of learning the art of French pastry at home. I guess it's the fiddly, complex and meticulous image that french cooking has, which has me intimidated to try. But really, when it comes down to it, if you have a little patience, the results can be really satisfying.

These wee madeleines may be a bit on the brown side, and the batter almost caramelised on the edge, but the inside was still fluffy with the perfect crumb. I think next time I'll put them out of the oven 2-3 minutes earlier, so be sure to keep an eye on them after the first 10 minutes! If you're making 24 mini ones, I think the max time you should have them in the oven should be 4-5 minutes!
I followed this recipe here, and added in an extra tablespoon of passionfruit powder just for something a lil different. Next time I might try this recipe here, where there is emphasis on using brown butter instead of just normal melted butter.


 I haven't even tried making macarons yet but it is definitely on my to-do list!
Hope you all are having a great weekend! I'm feeling a little bit slow today after a good night out with my work buddies last night so just laying low and taking it easy :)
X

These wee madeleines may be a bit on the brown side, and the batter almost caramelised on the edge, but the inside was still fluffy with the perfect crumb. I think next time I'll put them out of the oven 2-3 minutes earlier, so be sure to keep an eye on them after the first 10 minutes! If you're making 24 mini ones, I think the max time you should have them in the oven should be 4-5 minutes!
I followed this recipe here, and added in an extra tablespoon of passionfruit powder just for something a lil different. Next time I might try this recipe here, where there is emphasis on using brown butter instead of just normal melted butter.


Hope you all are having a great weekend! I'm feeling a little bit slow today after a good night out with my work buddies last night so just laying low and taking it easy :)
X
June 26, 2013
Food & Fashion - Scallop
To me, food and fashion go hand in hand... we all need to be fed and clothed right peeps? We all inspire and shape the world with our personalities and taste in these two topics, and having the freedom to do so in anyway we like, is just the icing on the inspiration cake.
And in celebration of that, I thought I would do a little food and fashion inspo series here on MLP...how fashion (for clothes or home decor) can inspire food, and how food can inspire fashion right back! Starting with the oh so pretty scallop pattern!


It's nearly the end of the week... hope you guys are making it through ok!... I'm into my second week in my new role at work and my mind is a bit information explosion at the moment! Thank goodness for MLP being in my life ey? :)
X
And in celebration of that, I thought I would do a little food and fashion inspo series here on MLP...how fashion (for clothes or home decor) can inspire food, and how food can inspire fashion right back! Starting with the oh so pretty scallop pattern!

Clockwise from top left: Scallop SWIMSUIT / Scallop HANDBAG / Scallop NECKLACE / Scallop BLACK VEST / Scallop PENCIL SKIRT / Scallop GOLD CUSHION COVER / Scallop CUFF

Clockwise from top left: POTATO GRATIN by Taste Australia / BLUE PETAL CAKE by Made From Scratch / MADELEINES by Mia Loves Pretty (blog post coming up soon :) here it is!) / APPLE MOSAIC TART WITH SALTED CARAMEL (oh-MY-GOD!) by Smitten Kitchen
X
June 24, 2013
Italian Wedding Soup - Oh My!
It has been fuuureeezzing this past week in Sydney, and now the stormy weather really has hit.
I came across the term Italian Wedding Soup and I was like, hold on... what...is...this? :D

You may have read about my love for all things Italian here, and there is no denying I love all things wedding related as well. Two of my favourite words in a recipe title... how could I resist?
I followed Ina Garten's recipe here, but before I did, I asked an Italian-Aussie friend at work whether she had a family recipe and she asked me what Italian Wedding Soup even was haha! From my very quick research, it seems this kind of soup would exist in any family with Italian roots... but perhaps made popular by the Italian-Americans. A slight mis-translation of the word "marriage" to the word "wedding", turned this favourite to be termed "Italian Wedding Soup". Either way, the marriage of Meat and Vegetables is beautiful and warming, and deeeelish :)

I used Endive (an Italian lettuce) instead of the baby spinach, and by chance, I found chicken sausage that was flavoured Roast Garlic and Cheese. So if you want, and if you can find the sausage flavour, I think you could skip the minced garlic and pecorino and parmesan cheese part of the recipe. I still added it in though, for an extra flavour boost.


 But you know what, alter the recipe as much as you like I think, shredded Roast chicken would go just as well... and how about alfabeto pasta instead of stars? The kiddies will love it!

We've had this soup re-heated with dinner, three nights in a row now. And I'm surprised that Jase still prompts it as a dinner addition each night as soup is normally MY push! Garnish with either some parmesan cheese, cracked pepper and/or chilli flakes, or simply have it on its own. Either way, this is PERFECT for winter chilly nights...or an alternative to a packed lunch :)

X
p.s. Hey guys, I'm over the moon that MLP has hit over 200 likes. I literally blinked my eyes and within a day, BAM! I'm pretty sure it was additionally spurred from the lovely shout out by Rachael over at Made From Scratch (check out her blog....it's BEEEAUTIFUL!), but I'm so surprised at all this support and its reassuring that you all enjoy my posts as much as I like posting. Thanks peeps from the bottom of my wee heart :)
I came across the term Italian Wedding Soup and I was like, hold on... what...is...this? :D

You may have read about my love for all things Italian here, and there is no denying I love all things wedding related as well. Two of my favourite words in a recipe title... how could I resist?
I followed Ina Garten's recipe here, but before I did, I asked an Italian-Aussie friend at work whether she had a family recipe and she asked me what Italian Wedding Soup even was haha! From my very quick research, it seems this kind of soup would exist in any family with Italian roots... but perhaps made popular by the Italian-Americans. A slight mis-translation of the word "marriage" to the word "wedding", turned this favourite to be termed "Italian Wedding Soup". Either way, the marriage of Meat and Vegetables is beautiful and warming, and deeeelish :)

I used Endive (an Italian lettuce) instead of the baby spinach, and by chance, I found chicken sausage that was flavoured Roast Garlic and Cheese. So if you want, and if you can find the sausage flavour, I think you could skip the minced garlic and pecorino and parmesan cheese part of the recipe. I still added it in though, for an extra flavour boost.


We've had this soup re-heated with dinner, three nights in a row now. And I'm surprised that Jase still prompts it as a dinner addition each night as soup is normally MY push! Garnish with either some parmesan cheese, cracked pepper and/or chilli flakes, or simply have it on its own. Either way, this is PERFECT for winter chilly nights...or an alternative to a packed lunch :)

X
p.s. Hey guys, I'm over the moon that MLP has hit over 200 likes. I literally blinked my eyes and within a day, BAM! I'm pretty sure it was additionally spurred from the lovely shout out by Rachael over at Made From Scratch (check out her blog....it's BEEEAUTIFUL!), but I'm so surprised at all this support and its reassuring that you all enjoy my posts as much as I like posting. Thanks peeps from the bottom of my wee heart :)
June 22, 2013
Crown Braids
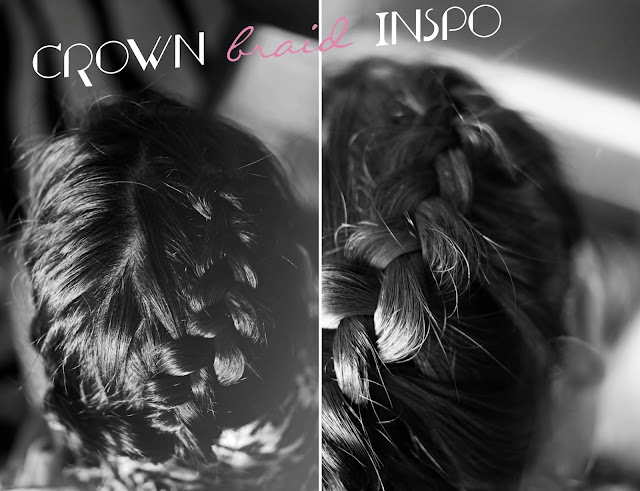

{LARGE DUTCH BRAID all around the perimeter of my head :) Beautifully plaited by my fave hairdresser; Rachel from Muse here in Sydney}

HALF UP via Hair Romance / SIDE LOOSE FRENCH PLAIT via Love Maegan / FRENCH PLAIT AT HAIRLINE via The Knot

MULTIPLE BRAIDS via Style Me Pretty / SIDE DO WITH SCATTERED BRAIDS via Blovedweddings / SIMPLE DUAL BRAIDS WITH BEEHIVE via KeikoLynn

LARGE LOOSE BRAID via OnceWed / WATERFALL BRAID via OnceWed / HALO BRAID via Wedding Chicks - (All wonderful tutorials!!)
Also here's a little girl inspo :)

Cutie little girl Crown Braid hair inspo via CUP OF JO
X
June 20, 2013
Manicures at home for Nail Colour that Lasts!
.jpg)
.jpg)
Like most girls, I love a good pampering. Lately, when it comes to getting nails done though, unless it was Shellac or Gel, I get disappointed with the chipping that occurs almost straight after getting manicures done in the salon these days. In Australia and NZ, manicures aren't as cost savvy as they are in the States or in Asia, so these days I like to DIY my manicures at home.
I know some of you ladies already do your nails this way (or even better!), but I thought to share my way. It's no rocket science, and it's really easy. I did have to tidy up a bit of the nail colour that travelled a bit to my cuticles (I only noticed it when I looked closely at the photos!), but you guys get the jist! Using OPI base and top coat is the best, and also make sure your nails and fingers are bone dry before colour application. My colour lasts AT LEAST 10 days without chipping or breakage. No chipping, no matter the nail polish brand! Love it! I'm typing away right now with the same nail polish...three weeks later.
Anyways, watch this in HD :)
Even though nail polishes like OPI, Essie and Butter, aren't cheap here either (compared to overseas), I'd rather spend $15-$20 on a bottle of colour, than $20-$30 on a manicure with a life span of 2 days. I'm kinda thinking that this should spur on a good ol' girly sleepover and a bit more shared pampering, don't you? Maybe...just MAYBE your guy mates can share in the fun? haha :)
Also, add some sparkle to your tips or to your nail beds/moons for a bit of DIY glam glam!
Happy Friday everyone!!
X
p.s. I am so in awe of vloggers / videographers/ stop motion makers and the like... editing is a big task! This was my first ever edit and the perfectionist in me couldn't stop going back and forth! The hubster only gave me high level instructions on how to use Vegas (the editing software I used) as well. Talk about a steep learning curve... but I secretly loved it :)
p.p.s If anyone's wondering, the song was licensed through www.songfreedom.com!
June 18, 2013
Black & White, Silver & Gold
I'm obsessed with golden hour.
And also I'm obsessed with holding my fringe up (bangs to the US peeps!) in the wind.
But more importantly, I'm obsessed with shoes. The way they prop you up and make you feel. A good pair that fits well,looks pretty, makes you wanna dance and makes you walk around confidently.
Some of you may have seen on instagram that I dug these gold studded beauties up from the archives a couple weeks back. Except that day I was prancing around at home in my leopard print pjs haha! Over the weekend though, I pranced around in a black and white outfit before heading out to dinner :)

And for some reason, pairing the gold along with a bit silver didn't clash too much!


 By the time we finished taking photos, the wind had miraculously blown my hair polka straight!


And also I'm obsessed with holding my fringe up (bangs to the US peeps!) in the wind.
But more importantly, I'm obsessed with shoes. The way they prop you up and make you feel. A good pair that fits well,looks pretty, makes you wanna dance and makes you walk around confidently.
Some of you may have seen on instagram that I dug these gold studded beauties up from the archives a couple weeks back. Except that day I was prancing around at home in my leopard print pjs haha! Over the weekend though, I pranced around in a black and white outfit before heading out to dinner :)


{White Open back blouse by Top Shop discont, similar feel HERE and HERE, VERY similar but in turquoise HERE / Leather shorts by Forever New, similar HERE / Silver clutch by Saben, unforunately discont! / Gold Studded booties by Steve Madden, 3 years old, but I found them here!}
XJune 14, 2013
Manuka Caramel Popcorn (Bacon optional)


Whilst flicking through the latest Donna Hay magazine I spotted a recipe for Caramel popcorn... oh but not your run-of-the-mill Caramel popcorn...Caramel BACON & CASHEWS popcorn. Perfect for munching on whilst playing indoors or rugged up and watching a movie. I personally favour buttered popcorn when its movie time (that, and a frozen coke mmm!), but the hubster has a sweet tooth and a particular penchant for caramel corn. Donna's salty but sweet option makes a perfect naughty match made in heaven.


Manuka Caramel Popcorn recipe
adapted from Donna Hay Magazine Issue
69
Ingredients:
- 1.5 Rice Bran Oil
- 1/2 Cup Popcorn kernels
- 40gm Unsaled butter
- 80gm Manuka honey
- 55gm Brown Sugar
- 75gm Caster (superfine) Sugar
- 1/2 Cup unsalted cashews, toasted and roughly chopped
- 1 tsp Baking Soda
- Fleur de Sel or Sea salt flakes for sprinkling
- 100gm Finely chopped strippy bacon, rind removed (optional)
Steps:
1. Lay out a sheet of
baking paper on a baking tray.
2. If you want to have
candied bacon. Heat a small teaspoon of oil in frying pan over high heat and
cook the bacon until very crispy. Drain on absorbent paper towel and set aside
3. Heat up the remaining
oil in a large heavy saucepan, add the popcorn kernels and cover with a tight
fitting lid. Shake the pan until kernels start to pop (around 4 minutes). Once
kernel popping becomes less frequent and you can see the pan is pretty much
full, remove from the heat and transfer to a large mixing bowl
4. Place the butter, honey,
brown and caster sugar in a small saucepan over low heat and cook until butter
is melted (stirring lightly). The increase heat to medium and bring the mixture
to the boil for 3-4 minutes or until golden and thickened.
5. Add the cashews (and
bacon), remove from the heat, add the baking soda and stir to combine.
6. Quickly pour the
cashew bacon mixture over the popcorn and mix to combine.
7. Spoon the caramel
popcorn onto your prepared baking tray, sprinkle with salt and let it stand
until the caramel is set
Serves 2-4 .... or maybe just 1 hungry husband :)
Instead of regular honey, I used NZ Manuka honey...Arataki brand in fact (all you kiwis know where it's at!), and this flavoured the popcorn with a familiar taste of home :)

X
Subscribe to:
Posts (Atom)
