May 10, 2013
Cap sleeved wedding gown details
It will be 6 months today since Jase and I got married, and it is a very fond memory indeed :)
I still love seeing wedding details and helping others search for items that help bring together their envisaged ideas of their big day. I'm soon to be a bridesmaid again in the near future, and am loving all the ideas and research that are bouncing back and forth between myself and my lovely engaged friend. I do especially love a challenge when a wedding photo is presented to me along with the question like;"where do you think those shoes are from?". To which I gladly answer "I don't know, but I accept the challenge of finding out!".
So I thought I'd carry on with the bridal detail posts that I have posted (like here, here, and here). Of course these won't be limited to just ideas and inspirations for the girls. The groom, groomsmen, page boys and Father-of-the-bride and grooms are equally important too. But for now, I will dedicate this post to Cap sleeved wedding gown details.

1. Source via Polka Dot Bride / Photography by Jonathan Wherett / Dress by Gwendolynne
2. Source & Photography by Byron Loves Fawn / Dress by Anna Campbell
3. Source via Style Me Pretty / Photography by Caught The Light / Dress by Frou Frou

4. Source via Polka Dot Bride / Photography by Harvard Wang / Dress by Gloria Grady Dressmaker (in Canberra, Australia)
5. Source via Style Me Pretty / Photography by Leo Patrone / Dress by Reem Acra
6. Source via Bridal Musings / Photography by Landa at I Am Yours Now / Dress by Claire Pettibone
7. Source & Photography via Lucy Spartalis / Dress by Karen Willis Holmes

8. Source via Magnolia Rouge / Photography by Christine Meintjes / Dress by Belle and Bunty
9. Source & Photography via Jose Villa / Dress by Claire Pettibone {my fave dress out of the lot... you should see the back, wowsers!}
Also here's a cutie in a cap sleeved detail :) Her dress was from Tea Princess

I didn't wear a sleeved white wedding gown on my wedding day... but it did cross my mind! I definitely appreciate all the wonderful options out there for you future brides and grooms. So hopefully these kinds of posts will help you narrow down your wedding research!
X
I still love seeing wedding details and helping others search for items that help bring together their envisaged ideas of their big day. I'm soon to be a bridesmaid again in the near future, and am loving all the ideas and research that are bouncing back and forth between myself and my lovely engaged friend. I do especially love a challenge when a wedding photo is presented to me along with the question like;"where do you think those shoes are from?". To which I gladly answer "I don't know, but I accept the challenge of finding out!".
So I thought I'd carry on with the bridal detail posts that I have posted (like here, here, and here). Of course these won't be limited to just ideas and inspirations for the girls. The groom, groomsmen, page boys and Father-of-the-bride and grooms are equally important too. But for now, I will dedicate this post to Cap sleeved wedding gown details.
1. Source via Polka Dot Bride / Photography by Jonathan Wherett / Dress by Gwendolynne
2. Source & Photography by Byron Loves Fawn / Dress by Anna Campbell
3. Source via Style Me Pretty / Photography by Caught The Light / Dress by Frou Frou

4. Source via Polka Dot Bride / Photography by Harvard Wang / Dress by Gloria Grady Dressmaker (in Canberra, Australia)
5. Source via Style Me Pretty / Photography by Leo Patrone / Dress by Reem Acra
6. Source via Bridal Musings / Photography by Landa at I Am Yours Now / Dress by Claire Pettibone
7. Source & Photography via Lucy Spartalis / Dress by Karen Willis Holmes

8. Source via Magnolia Rouge / Photography by Christine Meintjes / Dress by Belle and Bunty
9. Source & Photography via Jose Villa / Dress by Claire Pettibone {my fave dress out of the lot... you should see the back, wowsers!}
Also here's a cutie in a cap sleeved detail :) Her dress was from Tea Princess
I didn't wear a sleeved white wedding gown on my wedding day... but it did cross my mind! I definitely appreciate all the wonderful options out there for you future brides and grooms. So hopefully these kinds of posts will help you narrow down your wedding research!
X
May 06, 2013
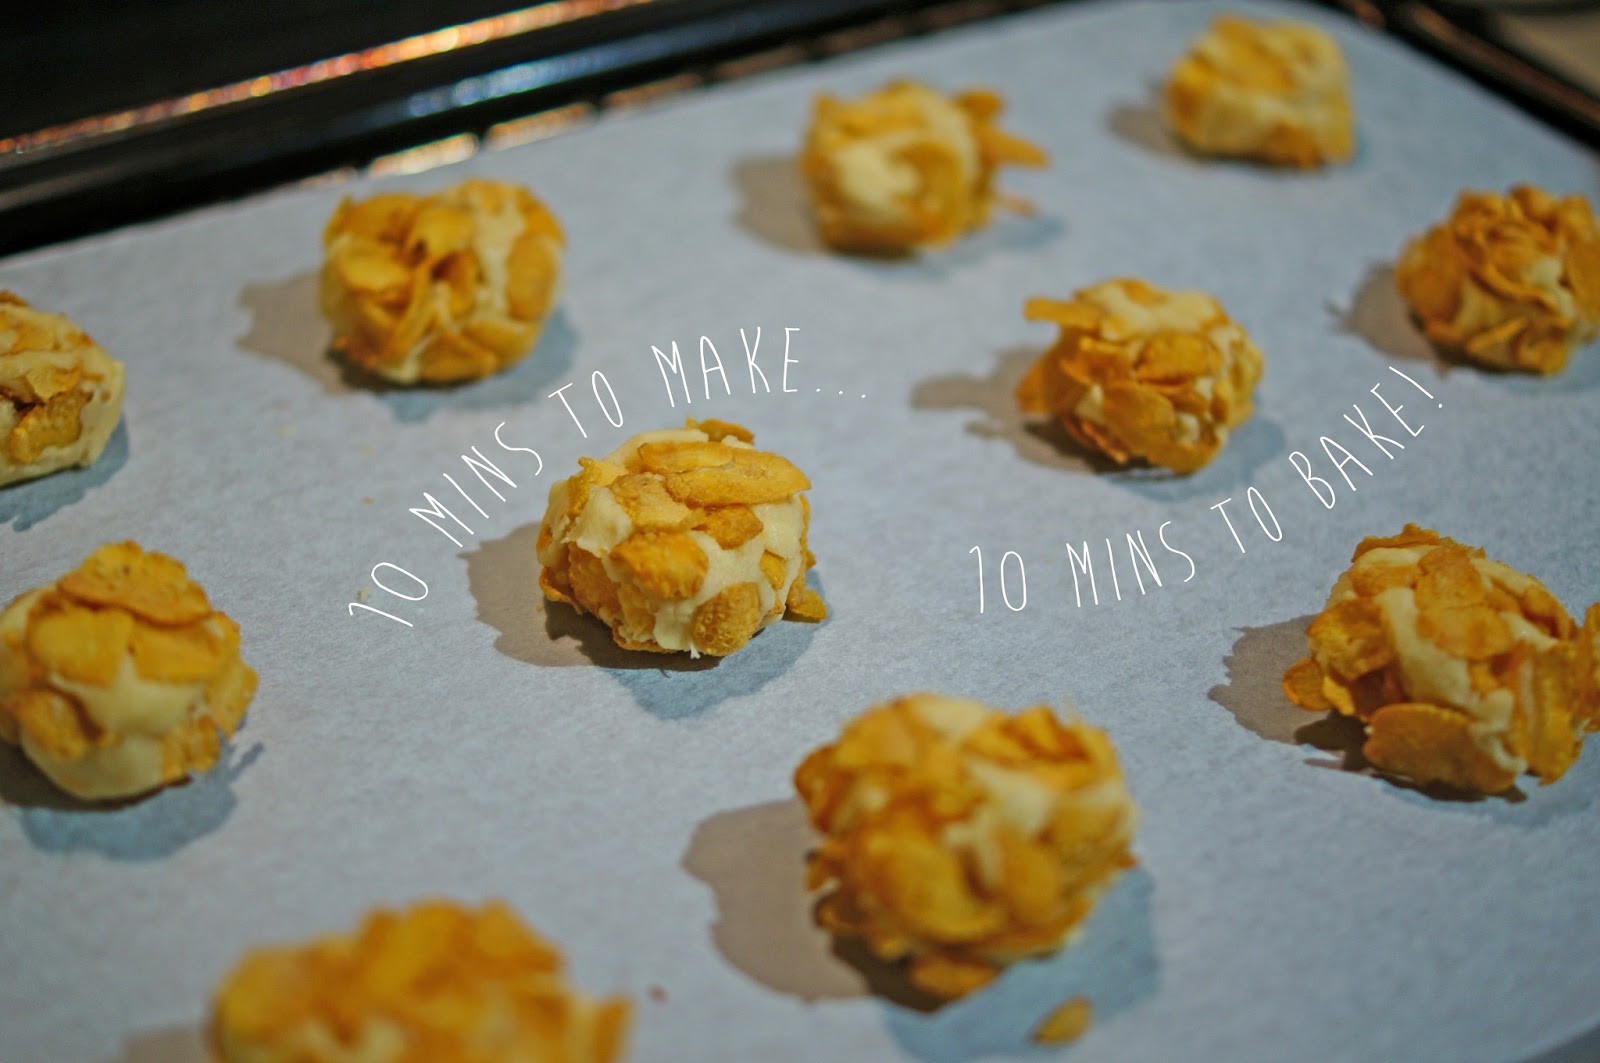
Aunty Sue's Mountain Cookies
Ok so here's going from one extreme to another. There's no need to wait 36 hours for the cookie dough to rest on this one. These are the quickest cookies you can bake with no sacrifice on more-ish-ness, or tastiness I love discovering family and friend's food secrets and recipes that have been passed through generations. These are the tried and true recipes that become old favourites, and played a hand in creating wonderful memories for those luckily enough to try the results. I hope to create some recipe secrets of my own that will pass on through the family tree. But for the moment, I'll continue discovering and collecting new ones. The following recipe comes from Jase's Aunty Sue. If you're a lover of shortbread or just anything buttery, short and with crunch, this is for you.

* I also added a teaspoon of good Vanilla Extract

 Ok tatas for now, all these 36 cookies have my name on it!! :)

X
Aunty Sue's Mountain Cookies
- 225gm Unsalted Butter
- 3/4 Cup Caster Sugar
- 1 Egg
- 2.5 Cups Self-Raising Flour
- 2 Cups Cornflakes
- Cream Butter & Sugar until fluffy using the whisk attachment on your mixer
- Add the Egg* and Flour to the creamed butter and sugar, using the paddle attachment on your mixer, until well combined.
- Roll small portions of the cookie dough in a small ball, and roll the ball around in the cornflakes.
- Place onto baking tray, press lightly with a fork, and place in 190degrees celcius oven for 10-12 mins.
- Out of the oven, and leave to cool on the tray before devouring.
* I also added a teaspoon of good Vanilla Extract

X
May 05, 2013
Quick, Fire, Bronzey eye!
Here's another smokey eye, however a bronzed up version. I must say, I'm finding it super difficult (and awkward) to take good makeup shots on my own with the camera. Most of the time it turns into a selfie photoshoot for like 20 minutes and then I give up, throw my hands up in the air, toss my makeup brushes out the window. You get the gist haha!


Until I figure it out, I think the camera phone will have to do for now, and even then, it's a bit of a pulling teeth situation! sorry peeps!
Products used for a quick BRONZE smokey eye look:
Face & cheeks
- MAC Studio Sculpt Foundation NC40
- MAC Select cover-up concealer in NC35
- MAC Select Moisture cover concealer in NW25
- MAC Studio fix powder in NC40
- MAC "Cantaloupe" blush (Mac pro line)
- Chanel "Soleil Tan de Chanel" bronzer
Eyes & brows
- MAC Shadestick "Below Ground" (ltd ed.) as base
- MAC "Mythical" on lid (ltd ed.)
- Napoleon Colour disc eyeshadow in #29 to line and shade
- Smashbox Brow Tech in "Brunette" on brows
- Maybelline mascara in Illegal Length "Very Black"
- MAC lashes #20
Lips
- Canmake Melty Matte Lip in "04"
May 03, 2013
36-hour-wait Chocolate Chip Cookie


I used Kate Miss' intepretation of the recipe here, simply because she calls it "The Only Chocolate Chip I Will Ever Need To Know How To Make For The Rest Of My Life". Them's fightin' words lady! But I do agree that yes, the following "must dos" are something to abide by:
- Use a mixture of bread flour and cake flour
- Wait the full length of time for the cookie dough to sit and "marinate" in the fridge
- Take the cookies out of the oven whilst soft at the minimum baking time (i.e. 15 mins). It's always easier to re-bake an under-cooked cookie, than to tearfully chuck an over-cooked cookie out!


I grew up with a big love for "Farmbake" chocolate chip fudge cookies, but this, my dear friends, really trumps that childhood memory. Happy weekend everyone!

X
May 02, 2013
Splurge or Curb: Bejewelled wrist wear
For my wedding, I dabbled in a bit of DIY to arm my wrist with as much sparkle as elegantly possible, remember this post here? Decadent jewellery is always something I've admired from the pages of Vogue, on the arms of royalty, on the arms of celebs on the red carpet and so forth. Nothing wrong with a bit of bling bling! The opulence is appealing, but the price tag, is of course, not so much.
When it comes to shopping for bracelets and cuffs, I find it super hard to find anything that would fit my puny little wrists. Until I found this little number from Witchery. Just the right amount of sparkle, just the right amount of heavy metal, and fits my little girl sized wrists.
Considering it's unique look, I thought this was a good buy for AUD 40 (it was on sale of course, but unfortunately not on the website any longer, similar feeling bejewelled bracelets and cuff beauties can be found here, here, here, here , here, and here OR take the splurgey route here and here)!


 So now that this makes me feel princess-y, I can go and wear this everyday with my ball gown :)
Joking aside, I think this bracelet would look great whether it's to accessorize a T-shirt dress and flats outfit, or paired against a toughened up look of leather and high heels. No need to splash out on jewels when you can test your patience, play around and buy great finds like this one! :)
X
When it comes to shopping for bracelets and cuffs, I find it super hard to find anything that would fit my puny little wrists. Until I found this little number from Witchery. Just the right amount of sparkle, just the right amount of heavy metal, and fits my little girl sized wrists.
Considering it's unique look, I thought this was a good buy for AUD 40 (it was on sale of course, but unfortunately not on the website any longer, similar feeling bejewelled bracelets and cuff beauties can be found here, here, here, here , here, and here OR take the splurgey route here and here)!


Joking aside, I think this bracelet would look great whether it's to accessorize a T-shirt dress and flats outfit, or paired against a toughened up look of leather and high heels. No need to splash out on jewels when you can test your patience, play around and buy great finds like this one! :)
X
Subscribe to:
Posts (Atom)


